5 Easy Ways To Spruce Up Costco Sheet Cakes

Loyal Costco shoppers know that the chain's sheet cakes are cheap and delicious, not to mention huge (they feed up to 48 people). The only real drawback is that they're pretty basic, decoration-wise. Luckily, it's super easy to upgrade your Costco dessert with a few special touches, and these can be as easy or elaborate as you like. Think of your purchase as the perfect blank canvas for your cake-decorating creativity.
Costco's layered sheet cakes come in two flavors: white cake with vanilla frosting and vanilla cheesecake mousse, or chocolate cake with chocolate frosting and chocolate cheesecake mousse. While you have some options for customization, the chain's bakery staff aren't allowed to fulfill special requests beyond what's on the ordering form. You can select designs such as a teddy bear, balloons, a rainbow, roses, a flag, and a baby shower decoration, as well writing on the cake. Besides that, making your cake look spiffy is in your hands. Whether you buy a plain cake or choose a Costco design to get a head start, try these five ideas for a spruced-up dessert that looks a lot more unique.
Change the amount, color, or taste of the frosting
While many people enjoy the taste of Costco sheet cakes, some might find them to be overloaded with frosting, or maybe the frosting is a bit too sweet. Since the hard part of baking and assembling the cake layers is done, you can just re-frost it, and you have a few methods to choose from.
To reduce the amount of frosting, just scrape some off of the top and sides and smooth out the remainder with a cake scraper or a rubber spatula. Then, re-pipe the border with a piping bag. If you dislike frosting in general, turn your Costco dessert into a naked cake, or one with the barest cost of frosting that's so thin, you can see the cake underneath. Just scrape most of it off for the lightest hint of sweetness.
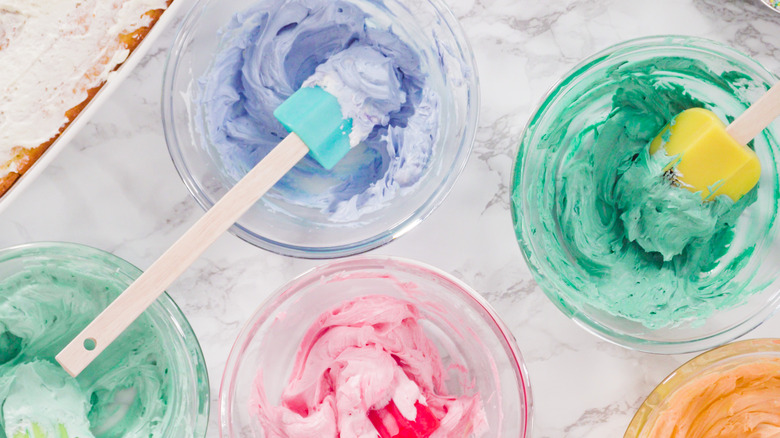
Another option is to change the color of the frosting (if it's vanilla). Start by scraping off all the frosting and putting it in a mixing bowl, then add a couple of drops of food coloring and mix. Once you've achieved your desired shade, spread the frosting back on the cake, making sure to save some frosting for piping the border. You can also add ingredients to change the taste of the frosting. For a cake for grown-ups, whip Baileys into the frosting for a fluffy, boozy twist. Or, make the frosting extra airy with one simple addition: whipped cream.
Add sprinkles and designs with parchment paper
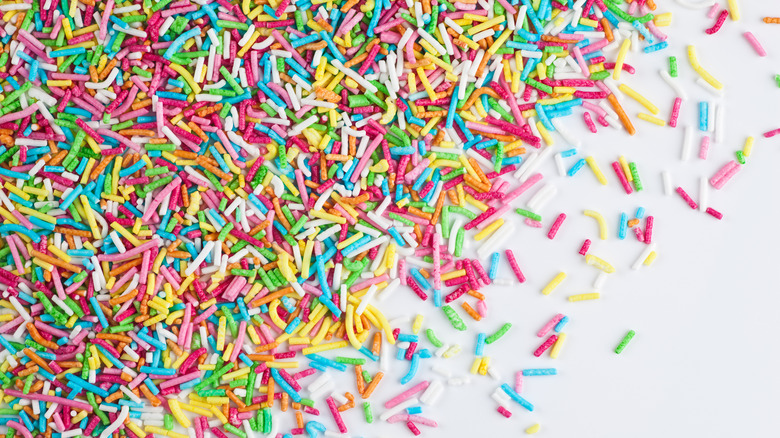
Who doesn't love sprinkles on a cake? They add instant color and a fun texture to the otherwise soft and smooth dessert. It's easy to shake a few jimmies on the top or sides of the cake, but why not get a little more creative? Try creating a fun design using a stencil made from parchment paper. Start by drawing a design on a sheet of parchment and cutting it out. You could do someone's age for a birthday party, a tree for Christmas, etc. Then, lay the paper on top of your cake and gently shake sprinkles over the whole design. Peel off the parchment paper slowly to avoid removing too much frosting, and voila!
If the paper ends up sticking too much to the cake, refrigerate it for around 15 minutes, and the sheet should peel off easily. You can pipe a frosting border around your sprinkle design to really make it pop. Parchment paper is also handy for drawing designs with icing. Create your own design or print one out, and trace it onto the parchment paper. Then, lay the paper on top of the cake and use a clean toothpick or knitting needle to poke holes in the paper, following the outline of your design in a connect-the-dots kind of pattern. When you peel the paper off, you'll have a dotted outline of your design that you can trace with your icing.
Add an edible picture
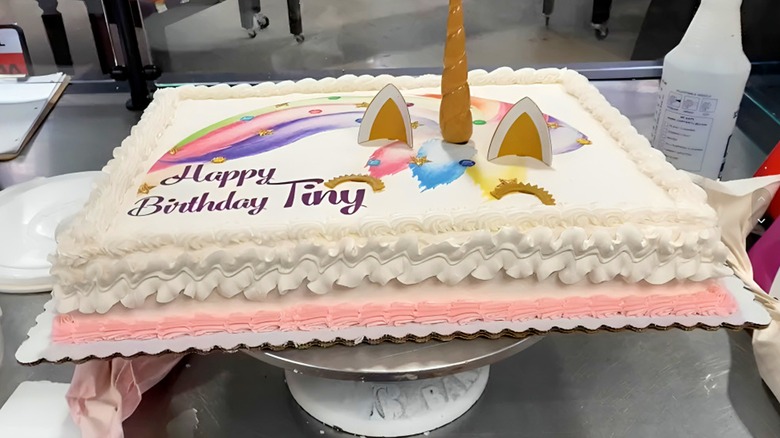
If you're unsure if you can nail a drawing of your kid's favorite superhero, or just want a more detailed design, try using an edible photo. You can actually buy edible icing sheets, which are essentially sheets of sugar with images printed on them with icing. You could also try edible wafer paper, which is made from potato starch and more transparent, with virtually no flavor. You can purchase both of these products online, with an image of your choosing printed on, and you may be able to upload a custom image. Keep in mind that photos printed on wafer paper may be a little blurry, due to the paper's transparency.
Edible wafer paper and icing sheets are easy to apply. For icing sheets, you typically just peel off the paper backing and lay it on top of your frosted cake (the frosting should not be stiff or dry, and the cake should not be frozen). Wafer paper won't have a backing and can be laid directly on top of a frosted cake. Pipe a border around the image to make it stay in place and look more well-integrated.
Notably, it's best to wait until the day of the celebration to place your edible photo on your cake. If it sits in the heat for too long, or in the refrigerator for a couple of days, the colors might run and the photo could wrinkle. Apply the design shortly before serving, if you can.
Add plastic toppers or make your own with fondant
For a complete makeover, give your cake a 3D effect with fondant or plastic cake toppers. Fondant is a pliable icing often used to wrap cakes, giving them a smooth, seamless look. Rolled fondant is typically made with sugar, water, corn syrup, and gelatin or glycerin to make it moldable. In addition to wrapping a cake in a sheet of fondant, you can use it to create shapes or figures, similar to working with clay or Play-Doh.
You'll need a lot of fondant (over 5 pounds) to wrap a Costco sheet cake, which measures at 12 by 16 inches. If you'd rather not wrap the whole cake, roll some fondant out and use a cookie cutter to cut shapes that can be pressed down on the top or on the sides. Or, create fondant animals, people, food, buildings, flowers, etc. — the sky's the limit, and imperfections simply add to the charm (not to mention the guest of honor will appreciate your hard work).
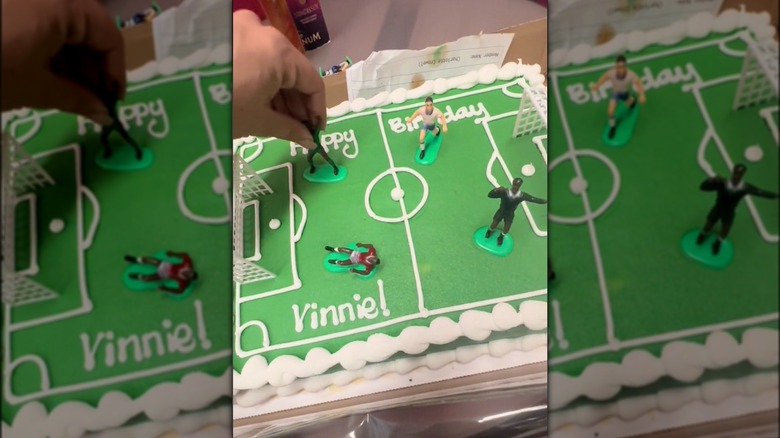
Another fun and fast way to completely overhaul your Costco sheet cake is to create a scene using plastic cake toppers or toys, like this Redditor who created a detailed dinosaur scene on their child's Costco birthday cake. Grab small toys you have lying around the house, or buy some cheap ones and stick them on the cake as a bonus for the birthday kid (making sure to wash them well beforehand, of course).
Stack multiple cakes for one luxurious dessert

For an ultra-fancy feel, consider stacking your Costco sheet cakes. Without having to bake cakes from scratch, you can still create a glamorous multi-tiered dessert for a special occasion, whether it be New Year's, a graduation party, or even a wedding.
The easiest way to pull this off is just to buy multiple sheet cakes and stack them, cutting each cake a little smaller as you go up for a tiered effect. If you like the look of a round cake, start with a sheet cake on the bottom, cut it to be round, and stack some of Costco's round cakes on top, cutting them and re-frosting as needed. For more than two layers, you definitely need to use cake boards and dowel rods to support your creation and hold it together. For a smaller stacked cake, consider this Costco muffin hack for effortless birthday cakes.
Once you've stacked your cakes successfully and added support, it's time to put your creative skills to work. Adding fresh flowers is an easy way to elevate a DIY wedding cake. Wrap the stems in floral tape before sticking the flowers in the cake, to prevent liquid from leaking into your dessert. Also, consult a florist to ensure your flowers aren't toxic and won't add any "off" flavors. You could also use fake flowers, or make edible ones with wafer paper, icing, or fondant.