Mistakes You're Probably Making When Cleaning Your Oven
We may receive a commission on purchases made from links.
Cleaning your oven is an important chore that keep your kitchen in working order and make your food taste better. But you might be making a mistake when cleaning your oven that leads to a less effective routine or even damage if you're not careful. Whether it's using the wrong cleaning products or leaving on extra grime and food residue, these mistakes might cost you a great meal in the future if you don't fix them.
We asked top cleaning experts to find out what mistakes people make when it's time to tackle this tedious job, as well as what to do instead, and tips to make the most of your efforts. Speaking about their experience with cleaning ovens (and beyond) are Marla Mock, President of Molly Maid, a home cleaning company; Taylor Riley, founder of Boom. Facility Service Advisors, a business that specializes in helping entrepreneurs start their own cleaning businesses; and Delah Gomasi, Managing Director & CEO of MaidForYou, a domestic cleaning company based in Australia. Each of our experts weighed in to share mistakes that they've seen that can get in the way of a clean oven, and some of the best ways to avoid them.
Not cleaning often enough
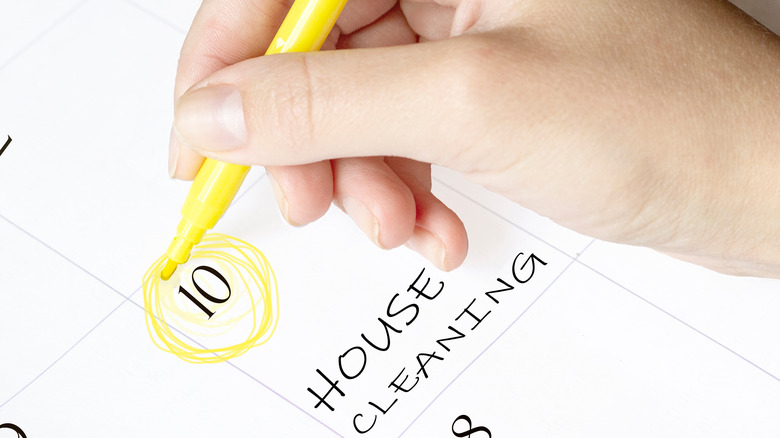
One of the top mistakes that people make, according to experts, is that they simply don't clean their oven often enough. While deep cleaning the oven may not be at the top of your to-do list, it's still important to prioritize this job because avoiding it will end up costing you more time and money in the long run. The best interval to clean your oven will vary based on use, but it's better to clean more often than not enough.
"You should aim to deep-clean the oven about every three to six months," says Marla Mock, President of Molly Maid. "Cleaning the oven at least every quarter will help you improve and maintain your oven's performance and lifespan." Of course, if you make a particularly messy dish or have to spot clean your oven, you can go above and beyond the quarterly clean.
Adding a deep clean to your routine will make your oven perform better and last longer. Not only will your food come out better but the coils will heat more efficiently, cutting down on energy costs. A dirty oven is also an increased fire risk, as built-up grease can catch fire if it comes into contact with flames or intense heat.
Leaving stubborn spots on
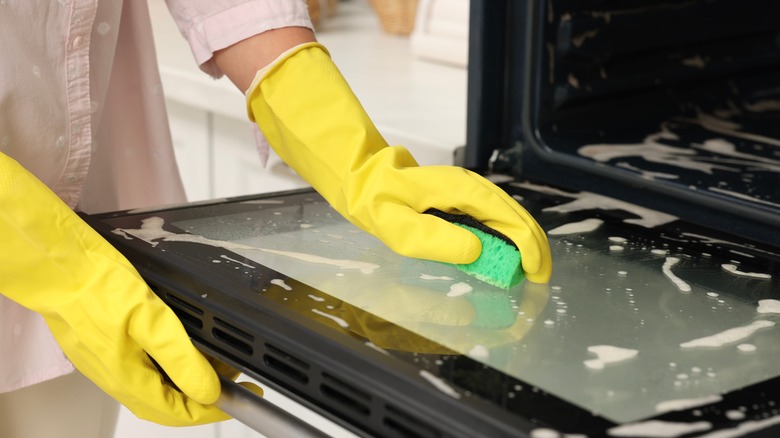
A little elbow grease might be required to scrub away built-up grime. It can be tempting to give your oven a once over and call it good enough, but stubborn dirt can lead to smoke and even fire if left on the surface. Using a dirty oven can also cause that grease and residue to become even more baked-on and resistant. Not only are you not taking care of the problem, you might be making it worse.
A mild cleaning solution might work to keep your kitchen sparkling but don't be afraid to bring out the big guns to tackle the really stubborn spots inside the oven. "Ovens can require heavy duty cleaning and it can be a tough task to remove hardened carbon stains in ovens and especially on oven trays," says Delah Gomasi, Managing Director and CEO at MaidForYou.
In addition to manual scrubbing, you can use a plastic scraper or silicone brush to help get rid of stuck-on dirt without scratching. "For stubborn spots, use a plastic scraper to ensure it does not damage the oven's surface," says Marla Mock. Other tools that she recommends to tackle cleaning even the most complicated ovens and burnt-on dirt include non-abrasive sponges or cloths. It's important not to use tools that will destroy the inside or outside of your oven while cleaning.
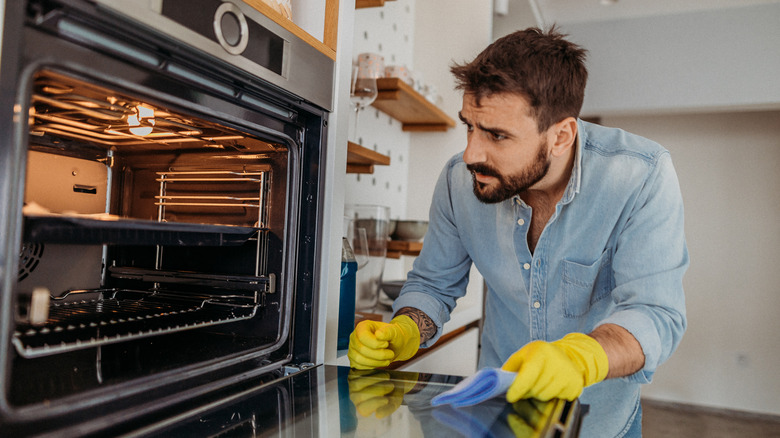
Beginning with the exterior
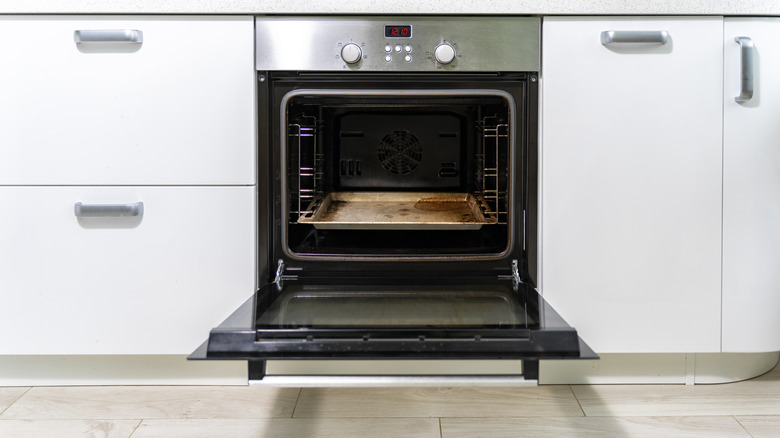
When cleaning, it's a good idea to take care of the least fun job first to get it out of the way, so it's not surprising that the oven is often at the top of the list. The interior of the oven is more likely to have baked-on food, spills, and general grime, so it's where you want to begin. It can also be the most timely, according to Marla Mock. "To clean an oven, start with the interior since that usually takes the longest to complete," she says.
Mock recommends pulling the racks out and tackling them separately. This allows you to get into every corner and crevice of the oven's interior, as well as thoroughly clean the door. Because the oven interior has the largest surface area as well as comes into contact with the most food, it can take longer than a quick wipe-down of the outside, and requires the most effort. You might also need to use harsher cleaning products and let them sit on the surface for some time to work best. It's important to pay close attention to where you are using particular products, since some can be abrasive on the delicate heating element in your oven.
Scrubbing away cleaning paste right away
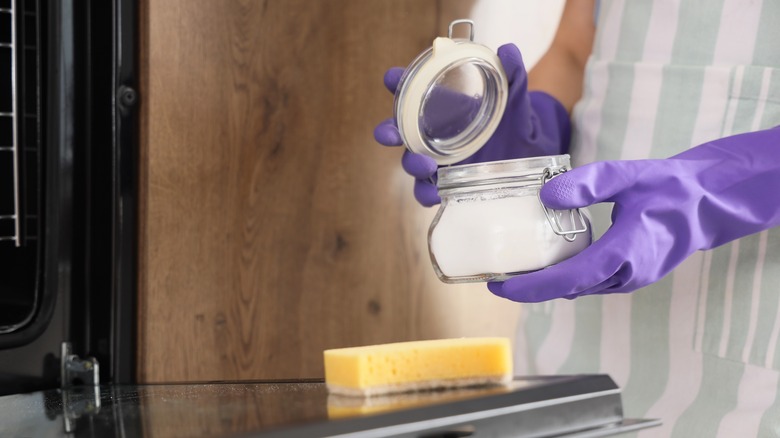
Whether you use a store-bought paste or make your own with baking soda, it needs to sit on the oven's surface to do its work. If you put it on and immediately wipe it away, you'll be using a lot more effort and not getting any of the benefits of the solution. Instead, give it some time to penetrate grease, food, and stains.
Baking soda is an alkaline powder that lifts up dirt and grime when combined with water. If you mix it with an acid, such as white vinegar, it creates fizzy carbon dioxide bubbles that help degrade residue and even food stains. A commercial oven cleaner uses similar chemical ingredients to have the same effect, although some go even further to break down carbon.
You may be surprised to learn how long cleaning paste truly needs to work. Per Marla Mock, president of the home cleaning company Molly Made, you should allow your paste to rest overnight to remove an stubborn, baked-in grime. For a homemade cleaning paste, Mock recommends using ingredients from your pantry. "Create a paste using ¾ cup baking soda and ¼ cup water and apply it generously to the interior surfaces, avoiding the heating elements," she says. If you let it penetrate the dirt, you can often just wipe away the residue the next day with minimal effort.
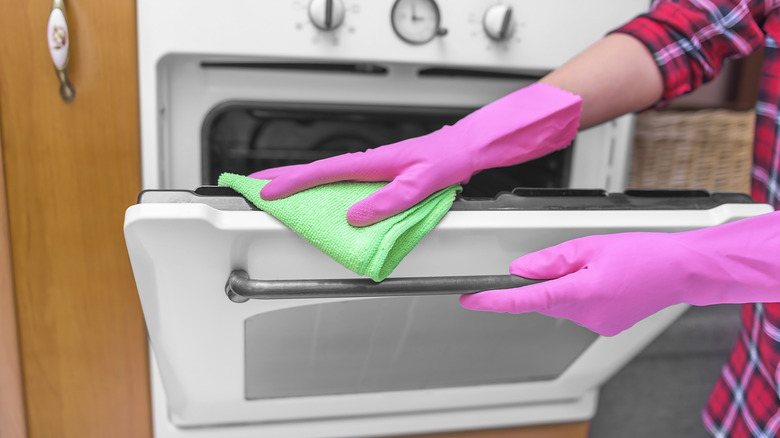
Forgetting to remove post-cleaning residue

Even after you get your oven clean, it's important to wipe off any extra cleaning solution before getting back to cooking. Marla Mock says that using a damp cloth or sponge is the best way to "gently scrub away the paste." Wipe away all extra residue with a clean sponge, making sure to rinse between wipes if needed. Once you are finished, go over the surface with a fresh sponge or towel to make the surface is completely clean and ready to use.
Because some cleaners are made with harsh chemicals, the last thing that you want when cooking your next meal is a linger trace of cleaner inside the oven. Not only will it smell bad and impact the taste of your food, but it might be a health hazard. Taylor Riley, founder of Boom. Facility Service Advisors, likes Easy-Off because it "works by breaking down grease and baked-on messes in a fraction of the time" compared to the self-cleaning cycle of your oven. However, it's recommended to wipe away excess with a cloth or sponge and even cleaning your oven multiple times, if needed, to get all of the residue off.
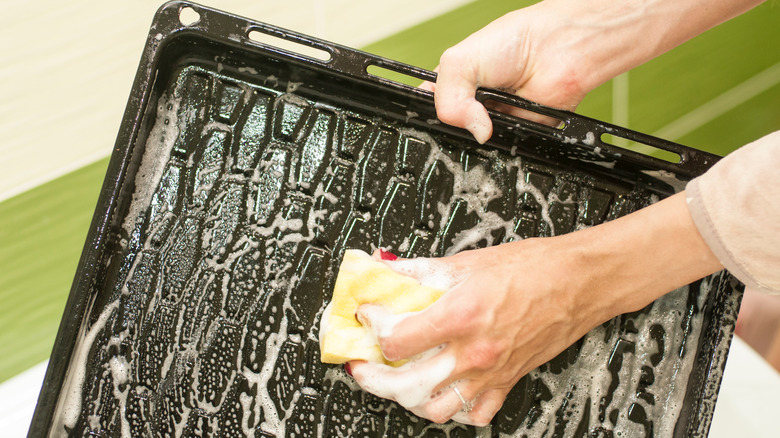
Cleaning racks in the oven

While a quick wipe may work for spot messes, a thorough cleaning of your oven's racks requires some extra work. For the best clean, remove the oven racks and tackle them separately. This allows you to get into every nook and cranny of the oven's interior as well as thoroughly scrub the rack itself. You may need to let it soak to lift up really stubborn spots.
"Take the racks out of the oven and place them in a bathtub, shower, or large sink," says Marla Mock. "Sprinkle some baking soda over the racks, then pour white vinegar on top. Allow the mixture to fizz and work its magic for a few hours to loosen up the built-up grime."
If you are using cleaning solutions, make sure to take steps to protect the surface underneath the rack. "I've had clients who place oven racks on kitchen benchtops to dry after being sprayed with oven cleaner," says Delah Gomasi, Managing Director and CEO at MaidForYou. "Even though you may have wiped the cleaner off the racks, there is always a chance that some residue remains and you can always tell the homes in which this has occurred because there are vertical lines etched into their bench top." Putting down a waterproof pad or thick towel is often enough to protect the surface underneath.
Not preparing for the self-cleaning cycle
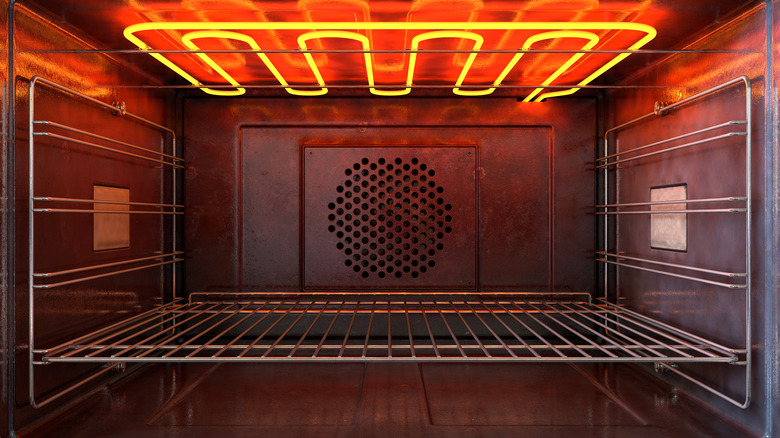
The self-cleaning cycle on most ovens is convenient but it requires you to think ahead before you start it up. "This method heats the oven to extremely high temperatures to burn off any residue, leaving you with a fine ash that can be wiped away after the cycle finishes," says Taylor Riley. "However, the self-cleaning process can take several hours, so it's important to run it when you have plenty of time and can stay home."
Because it can take a few hours, you should set aside the time required for the cycle to completely run. It's also a good idea to use this time to clean your oven racks, which should be removed during this part of the cycle. To be extra efficient, do this as the oven goes through self-cleaning.
To give your oven's settings an extra boost, put fresh lemon juice in an oven-safe bowl and steam it on low heat for 20 minutes. This can lift up dirt, making the self-cleaning more effective. Other professionals recommend scrubbing over using the self-cleaning cycle because you have more control over the cleaning process. For older or damaged ovens, this setting might be too much for the interior to handle. Delah Gomasi adds that the high heat of the self-cleaning setting can cause damage to the oven's glass panes. If you do decide to try this option, follow the directions from your oven's manufacturer and watch the oven closely as it cleans.
Leaving your house during your oven's self-cleaning

If you do opt for the self-cleaning cycle, you shouldn't be too far away from the kitchen as your oven works. "You should never leave the house during the self-cleaning cycle as the oven can get very hot, and sometimes a bit smoky, depending on how much buildup there is," says Taylor Riley. "While this is an effective way to clean, the time commitment is something to keep in mind."
The self-cleaning setting gets stuck-on grime off of your oven's interior surfaces, which you can then wipe out later. Because the self-cleaning cycle can go up 800 or 900 degrees Fahrenheit, that also means stuck-on grime is being incinerated. To prevent damage to your house, make sure to carefully monitor the oven as it cleans and don't leave home.
You may also want to open a window or provide ventilation from a fan as it runs. Although most kitchens have smoke detectors near the oven to alert you if there is a fire or other dangerous situations, venting the smoke outside can keep the alarm from going off mistakenly. It also means that you should remain nearby to monitor in case of a real emergency.
Thinking that cleaning is one-and-done
Don't be afraid to clean your oven twice (or more) to get everything off the interior surface. Cleaning your oven might require a few rounds to really get the best results. If you prefer to try the homemade cleaner approach, use it for an initial cleaning phase. Then, bring in more caustic, thus chemically effective, options for subsequent work. Getting rid of the top layer of grime can also help you pinpoint exactly where you need to focus when you do your second round.
Removing the oven racks is also beneficial for many parts of the cleaning process, especially because you can get a better view of the oven. You can turn the racks themselves over to make sure that every bit of residue is off, as well as inspect the inside of your oven. If there is a spot or stain that requires a second cleaning treatment, you're more likely to see it in an empty oven. Don't forget to wipe down the gaskets around the edge of the oven, as well as the exterior and handle.
Using dish soap
Dish soap might be enough to get rid of minor food residue and baked-on messes, but to deep clean your oven, you'll likely need to bring in some of the heavy hitter products. This is especially true if you haven't wiped down oven in awhile (or ever) or have a lot of burnt-on messes to clear out. You should use a designated oven cleaner or baking soda-vinegar mixture for the best results, especially if you're dealing with stubborn stains or months of grime and grease. Dish soap just doesn't do the trick because it doesn't break down the carbon that can accumulate on the surface.
Delah Gomasi, Managing Director and CEO of MaidForYou says that while it may be able to handle surface dirt, dish soap is "not caustic enough to remove pent up carbon deposits, especially on oven trays." Instead, specialty oven cleaners are needed to really penetrate the surface and lift up the dirt during the cleaning process. He recommends handling these cleaners with care, since the same properties that make them great at getting your oven sparkling are note great for skin.
Inadequate ventilation

Some cleaning products can be strong and irritating to your senses, which is made even more noticeable if you don't ventilate your kitchen. Make sure that you have clear airflow when cleaning your oven, and also consider what personal protective equipment you can use to keep from getting lightheaded or sick. Delah Gomasi has his team wear gear to cover hands and exposed skin as well as provide a barrier between their eyes and any harsh cleaners. Have some leftover masks from the pandemic? This is a great time to use them. If you're using homemade cleaning solutions, make sure that you know which combinations can be harmful and should be avoided, such as bleach and ammonia.
When using the self-cleaning cycle, smoke can also be a factor, since high heat plus grease and grime may cause this kind of reaction. "I always recommend opening a few windows to help ventilate the area if the process causes smoke," says Taylor Riley. This can also help get your kitchen back to its normal pleasant environment faster after your oven is done cleaning.
Forgetting about overspray

Oven cleaners are harsh because they have to break down a lot of grime but that also means that they will break down other surfaces, like furniture, countertops, and even your oven's exterior hardware. First, know which cleaners you can use on which parts of your oven. Some cleaners are too abrasive or strong to have around the heating elements but work great for oven racks, which you should remove to clean anyway. Others add shine to the oven's exterior but won't tackle baked-on food residue inside. You may want to use multiple products to clean your oven and take steps to isolate them to just the area where they are needed.
Chemical cleaners like Easy-Off work great on grease and grime but are some of the strongest options out there, so take extra care when using them. "Oven cleaner is extremely caustic and we've come across multiple kitchens whereby sensitive surfaces have been destroyed through improper care when using oven cleaners," says Delah Gomasi. Many come in spray applications, which can make controlling the solution even harder. Protect delicate kitchen surfaces with a sheet or by taping them off.