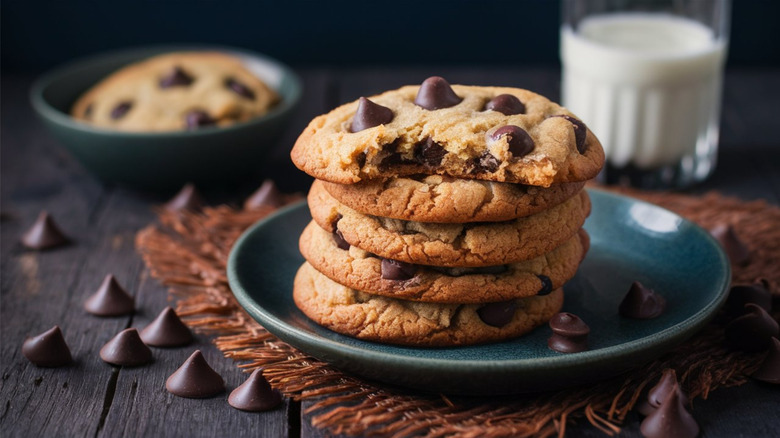
13 Mistakes That Will Totally Ruin Your Chocolate Chip Cookies
We may receive a commission on purchases made from links.
Of all the baked goods you can bake, the chocolate chip cookie might be the one that's practically a no-brainer. Most people rely on a favorite recipe, be it from a Toll House package or a cookbook by Dorie Greenspan, that guides them from point A to point B with little fuss. But over familiarity can lead to a slew of unconscious mistakes, dragging your cookies from the tier of tried-and-true classic to mild mediocrity.
Trust me on this. I've had plenty of failures and triumphs in the kitchen with chocolate chip cookies during my time as a managing editor of a baking magazine. Heck, I even once hosted a whole podcast episode on tips for baking the best chocolate chip cookies, with a particular focus on what flour to use. Though they're a deceptively simple baked good, missteps can be made at every turn, from ingredient selection to dough prep. As any baker will tell you, the devil is in the details. I'm here to help you exercise these cookie demons, leaving you with the best batch you can make.
1. Neglecting to refrigerate your cookie dough
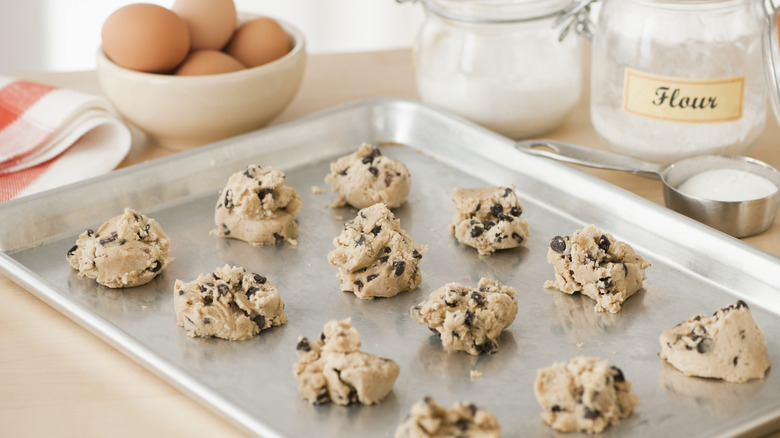
One of the first hurdles a baker has to learn to master is patience. In a world increasingly focused on instant gratification, the wait times that baking calls for can drive an average person bonkers. Yes, even the humble chocolate chip cookie benefits from a dedicated rest in the fridge.
This idea initially comes from Jacques Torres, the chocolate maestro who introduced us to his chocolate chip cookie in The New York Times. His brilliant hack for better cookies relies on aging your cookie dough in the fridge, with the longest rest period clocking in at 72 hours. I'm not that fussy, but a chocolate chip cookie dough that sits in the fridge for at least 24 hours is the best tasting cookie to me, no arguments. During this time, the fat solidifies and sets up, the flour hydrates, and the flavors mature. Everything gets better.
You'll notice that the aged cookie get's more toasted and brown in the oven than a mix and drop cookie — a caramelization bonus, in my book. A number of people find even 1 or 2 hours sufficient time in the fridge to enhance the texture and flavor of a cookie. Whatever time span you select, a day or an hour, you should chill and rest your cookie dough for some length of time.
2. Not using brown butter
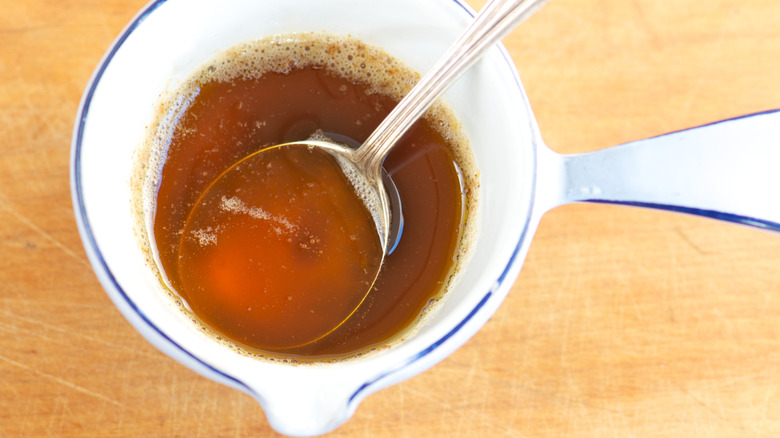
First, let's address what kind of fats a typical chocolate chip cookie recipe calls for. In most cases, butter is the classic choice, with shortening and oil popping up occasionally. What really sets a chocolate chip cookie recipe apart isn't the fat the used, but how that fat is incorporated. Two methods dominate: You either melt butter and stir it in or cream softened butter with the sugar. Melted butter leads to a denser, chewier cookie, my own personal preference, while creamed butter leads to a fluffier, lighter texture (we'll get to creaming in just a bit).
Since I prefer melted butter for its ease and texture benefits, I usually decide to take the method one step further and brown it. By cooking the butter until browned, bakers can bring out all the nutty, caramel notes in chocolate chip cookies. Some water will evaporate off during browning (each stick is made up of about 16% to 18% water), so you can add an extra tablespoon or two of regular melted butter to incorporate more moisture to the dough. Water or a splash of milk will also work.
3. Under-creaming your butter
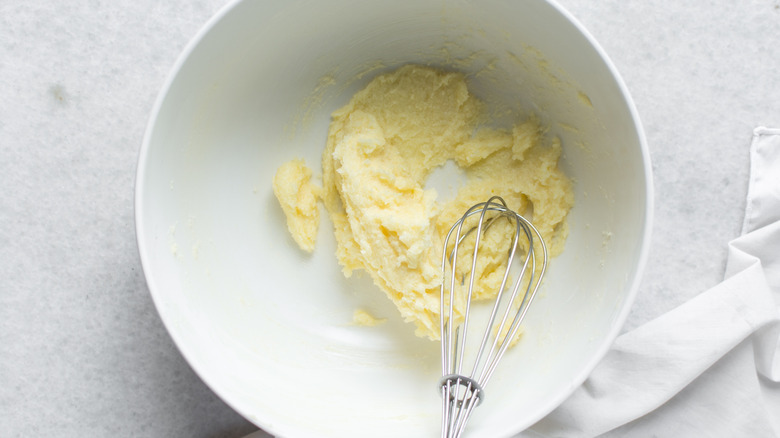
While I have a personal preference for melted butter in my chocolate chip cookies, if you're the type of person who likes soft and fluffy cookies, you'll want to go with a recipe that creams the butter and sugar. First things first: Make sure your butter is at the right temperature. While many recipes call for "room temperature" butter (68 to 70 degrees Fahrenheit), I find softened butter (60 to 65 degrees Fahrenheit) to be the best temp for creaming. The slight degree difference affects how much air you can whip into your dough.
Here's the second big rule of thumb: You need to beat this butter-sugar mixture a lot — much more than you actually think. While you may just beat it long enough for the sugar and butter to blend (2 to 3 minutes), you should be creaming it until it's gone pale in color and gotten significantly light and fluffy (5 to 10 minutes if you can handle it). Think of it as the difference between making a greasy paste and a fluffy cloud. As you blend, you're whipping air into your dough, increasing the volume and lift of your final cookie.
4. Forgetting the extract

With the dominant flavors of the cookie seeming to be chocolate and brown sugar, a lot of people will neglect adding enough or any vanilla extract to their cookies. This is a grievous oversight, as the vanilla plays a huge role in rounding out the flavor. I tend to equate vanilla to salt — all baked goods turn out more bland and boring without it.
As I believe that vanilla enhances everything it touches, I prefer to use a generous whole tablespoon for a typical chocolate chip cookie recipe. That may seem like a lot, but heavier pours tend to create more flavorful, nuanced cookies. I'll even mix in some vanilla bean paste if I feel like seeing that beautiful vanilla seed speckle in my dough. If you're magically out of vanilla (we've all been there), a splash of bourbon, brandy, or rum will work well. Even non-alcoholic options like maple syrup are better than just adding nothing.
5. Using chocolate chips instead of chopped chocolate

Though they are the nostalgic choice, chocolate chips are not the be-all-end-all for a chocolate studded cookie. Even the best chocolate chips (Ghirardelli and Guittard, in my book) have chemical stabilizers in their formula, which keep them from melting in the oven. This makes them keep their cute shape, but also makes them not nearly as pleasing to bite into.
If you want to get the well-dispersed and glossy, melted pools of chocolate you see in bakery-style chocolate chip cookies, you need to invest in chopped chocolate. Regular baking chocolate bars — which are different from solid chocolate candy bars — will spread into luxurious puddles rather than clump up in perky chunks. This will also help you pinpoint your chocolate's cacao percentage, which essentially tells you how intense the cocoa flavor will be. Bars tend to show their specific cacao percentage on the packaging, while most chips use vague, unregulated terms like "semi-sweet," "bittersweet," and "milk" to describe their flavor. Still, if you miss the nostalgic appeal of the chips, use a blend of chopped chocolate and chips for best of both worlds.
6. Sticking to just all-purpose flour
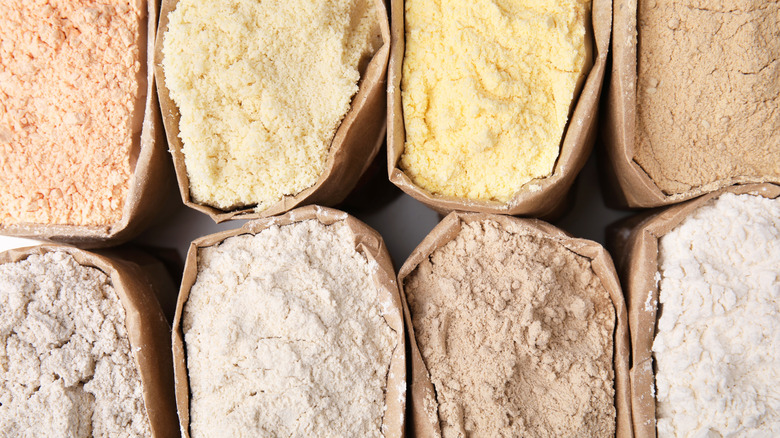
All-purpose flour makes perfectly fine chocolate chip cookies, but sticking to just one variety is limiting your cookie's potential. Blended with soft, all-purpose flour, high-protein bread flour can add delicious chew, while semolina flour can bring an almost crispy, buttery quality. Whole wheat flour adds nuttiness, while rye flour adds earthy oomph (just add whiskey and make it sweet take on rye whiskey). Even almond flour would bring some aromatic charm to the table. Each one of these flours can incorporate a new depth of flavor and texture to the dough.
Keep in mind that almost all of these high-protein flours should be blended with a softer, low-protein flour so that the cookie doesn't become too tough. Turning back to that wonderful Jacques Torres recipe again, he uses a 1-to-1 by weight blend of cake flour (low protein) and bread flour (high protein). Although it should be noted that foodie Alton Brown uses all bread flour for his chewy chocolate chip cookie recipe, which has drawn zero criticism from his fans. So, you may be able to get away with 100% bread flour.
7. Messing with the sugar content
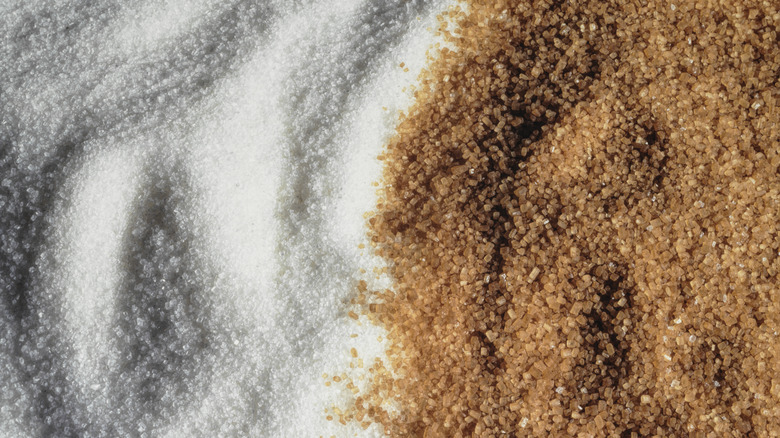
A blend of white sugar and brown sugar is one of the defining factors of a chocolate chip cookie recipe. It determines both how the flavor and texture of your cookies will be, whether soft with just a hint of molasses, or dark and crunchy with a thoroughly caramel taste. If you cut down or add to these ratios, you're flirting with disaster. Typically, a cookie recipe will use a blend of dark brown sugar and white, light brown sugar and white, or all brown sugar. No single iteration is better than the other objectively. Instead it all comes down to preference.
If you like a classic style, a mix of white to brown sugar would be your best bet. If you want more caramelization, take it a step further and use a blend of dark brown sugar and white sugar. If you want the height of toffee flavor, go with a chocolate chip cookie recipe that uses all brown sugar. Still, whatever cookie recipe you select, stick to the ratios given, as tampering with it will affect bake time, texture, and taste.
8. Not adding an extra egg yolk (or egg white)
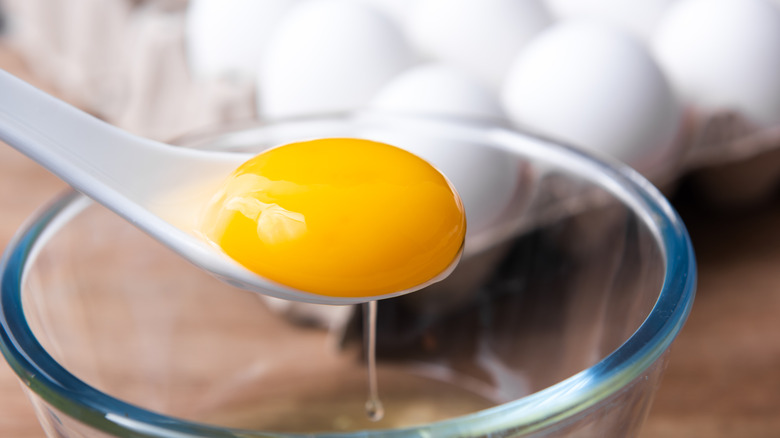
If you think the eggs in your cookie dough are just added as a sticky binder, think again. Sure, eggs help emulsify some of the ingredients and helps glue the dough into a homogenous mass. But it also brings rich fat and flavor to the table. With that in mind, one of my favorite ways to make a chewier, richer cookie is by adding an extra egg yolk in with the eggs. When chocolate chip cookie recipe shopping, I find my favorites always have an extra yolk or two, plus a regular egg for binding power.
Heck, there are some recipes that use only egg yolks, nixing the egg whites entirely. I don't need it that rich, but it's nice to know that's an option. Overall, I like there to be some egg white present as well, as that brings a welcome dose of moisture and water to the dough. That water becomes steam which in turn makes for a puffier, less flat cookie.
9. Nixing the salt
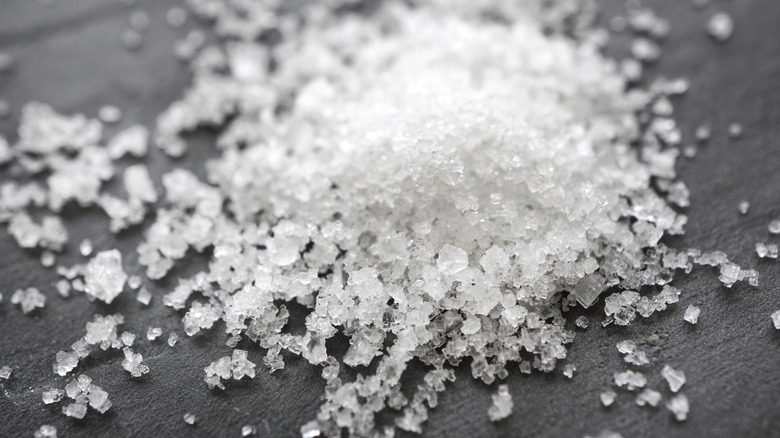
Whether you sprinkle it on as a finishing salt at the end of baking or make sure it's added to the dough, salt is key to accentuating the sweetness and richness of the cookie. My main complaint with some fancy bakeries is their refusal to use enough salt. Admittedly, it's a subjective topic, but no matter the preference, some salt is necessary to add nuance to a chocolate chip cookie.
There are several ways you can make sure you're getting enough salt in the dough. The first is to add a fine-grain variety — whether it's table salt or sea salt — into the dough. Finely ground salt will dissolve and disperse more evenly into your cookie dough. You could also sprinkle large salt flakes onto your cookie after baking, but that's for the true salt lover to try. The last option is controversial among bakers: Use salted butter. Though the baking world has largely eschewed salted butter, I think it helps, not harms, chocolate chip cookies. As long as I have a good knowledge of how salty the brand I'm using is, I can account for its salt level in my recipe.
10. Forgetting to place some chocolate on top
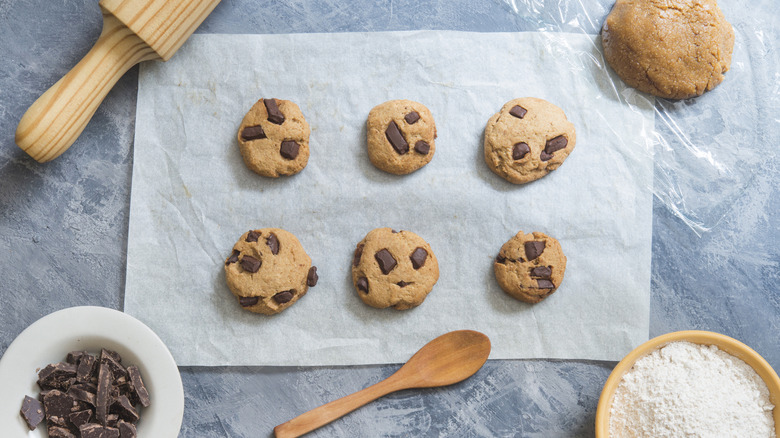
If you've ever wondered how bloggers or magazines get picture perfect chocolate chip cookies, it's because they're using a super easy, wildly basic cookie dough hack. After you've rolled your chocolate chip cookies into dough balls but before you place them into the oven, press some large, generous chunks of chocolate directly into the top of the cookie.
During baking, these cherry-picked chocolate pieces will become even, glossy focal points, no longer hidden beneath beige dough. Think of it as a baker's way of airbrushing and enhancing the best parts of their cookie. The hardest part of this hack is to remember to hold back some chocolate when you're initially mixing the dough. Other than that, a bit of pressure from your thumb is all that's required. Pro tip: this visual trick also works with other cookie fillers, like toasted nuts, sprinkles, or candy pieces.
11. Baking your cookies on a dark pan

Pan color matters, especially when baking something with brown sugar or molasses. Even if you love that tried-and-true dark tinted sheet pan for your veggies and chicken roast, you'll regret using it for your chocolate chip cookies. Why? Dark colored cooking pans absorb and disperses heat way more efficiently than a light colored pan. This is great for the aforementioned veggies, but bad for your delicate cookies. The molasses in the brown sugar is already prone to burning, so you'll risk blackening the bottoms of the cookies at the very least.
In addition to selecting a light colored pan, make sure you're also using parchment paper for lining. Parchment paper (as opposed to wax-coated wax paper) will keep your cookies from sticking to the pan and handle the moderate heat of the oven well (it only starts to burn at temps of 400 to 420 degrees Fahrenheit). Aluminum foil will cause the same problems as the dark tinted sheet pan, scorching the bottom of your cookies.
12. Neglecting to calibrate your oven
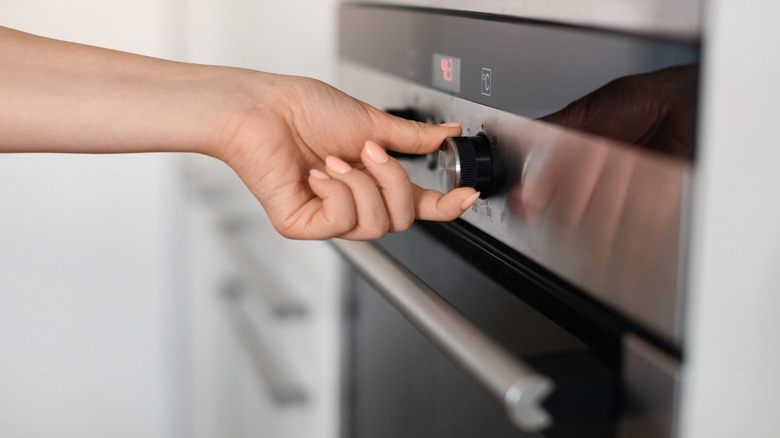
If you want to know what real temperature your oven is running — trust me, they all lie — buy an oven thermometer (like this Pecula Oven Thermometer). This is extremely important if your oven is new to you, as it probably runs hot or cold and not dead on the money. This is the only way that you can accurately bake your cookies per the recipe instructions (besides investing in a kitchen scale, which is a soapbox to stand on for another time). Unless you want underbaked, overbaked, or unevenly baked cookies, get an oven thermometer. Again, the brown sugar in your dough makes this type of cookie very sensitive to improperly calibrated ovens.
Another oven caveat: If you're working with a convection oven, you should decrease whatever temperature the recipe calls for by 25 degrees Fahrenheit. Unlike traditional ovens, convection ovens (also called fan-forced ovens) circulate the heat throughout, leading to faster, more even baking. Most convection ovens will autocorrect for this (mine will jump down to 325 degrees Fahrenheit even if I type in 350) but you should still be aware of it. At the very least, you should be checking your cookies doneness early, at least 5 minutes before the called for bake time to make sure nothing gets burned.
13. Not cooling your cookies on a cooling rack
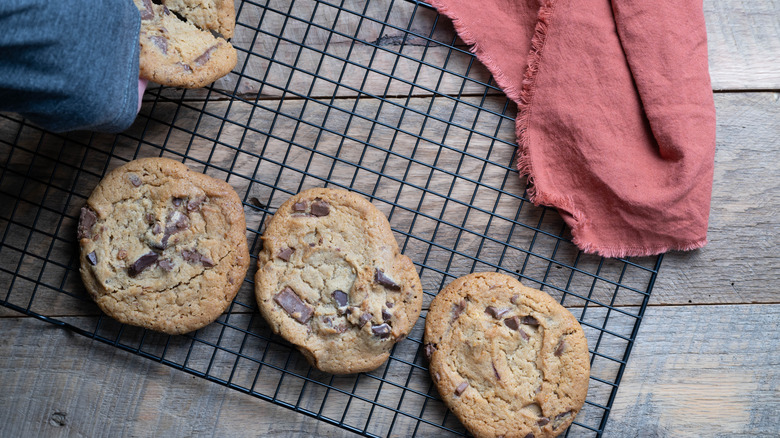
While many chocolate chip cookie recipes call for you to cool your cookies on the pan for a few minutes, they then say you should move those bad boys to a wire rack. Though it may be extremely tempting to be lazy, don't cool your cookies on the pan completely. That can lead to tough cookies or burnt cookie bottoms. Instead, let them cool on the pan for 5 minutes, then transfer to a cooling rack.
You may ask yourself why you can't just slip these cookies over to a plate. Again, it comes back to that all important cookie texture. If you cool them on a flat surface, moisture gets trapped on the bottom and makes gummy cookies. Cooling racks, with their open cross hatch pattern, helps to circulate air flow. In a pinch, an industrious baker that doesn't have a cooling rack could use a mesh sieve or pasta strainer to cool a few cookies at a time. But if you really love to make the big CCC, go ahead and invest in a wire rack.