13 Best Ways To Update Your Kitchen Cabinets (With No Paint)
We may receive a commission on purchases made from links.
Your house is only as contemporary as the kitchen and bathrooms. Even when you flaunt a lux living area with the latest furniture styles and state-of-the-art electronics, it only takes a turn of the head to spot the cooking corner and powder room frozen in decades past. Unfortunately, these two rooms rapidly decrease the value and appeal of a home, since they're the most challenging part of to redesign.
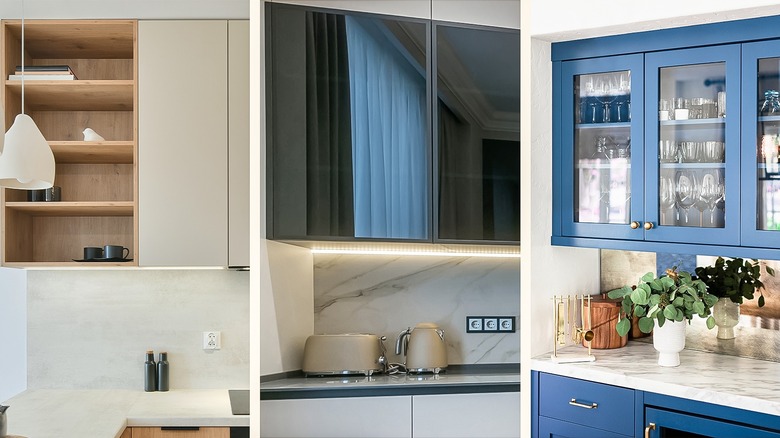
In a world where designs get dated in the blink of an eye, it can be tough to stay on top of the trends. Tasting Table dropped a list of outdated kitchen design trends we should avoid completely, and chances are, some element of your kitchen falls somewhere in the lineup. The outlet has a lot to say about kitchen cabinets alone, namely that all-white, open shelving, and modern farmhouse are all on the X list moving forward.
As an interior design and real estate writer for half a decade, I have several suggestions to redo your space that are fairly easy on your hands and your wallet. DIY sites often recommend a cabinet paint job if you lack the budget for a total remodel. But painting is for homeowners (in this economy?), meaning you may feel left out and hopeless if you're a renter. Don't despair because there are crafty and innovative ways to revamp your kitchen at a minimal cost or effort on your end, but with a jaw-dropping result all the same.
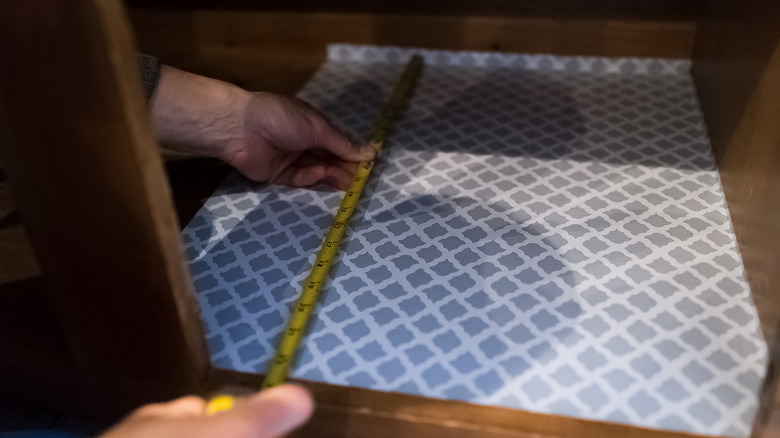
1. Use peel-and-stick wallpaper
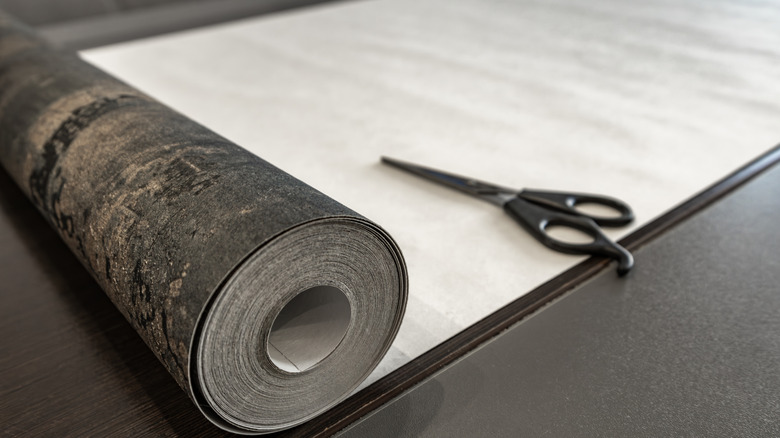
A renter's best-kept secret is low-maintenance yet high-appeal peel-and-stick wallpaper. If you keep up with the trends or convey your self-expression through interior design, you'll appreciate the free range of styles this temporary wallpaper offers on a dime. Even with the tightest budget, you can achieve a sophisticated look. When applied correctly (using a flattening tool like a ruler to smooth out any air bubbles), it can be hard for the untrained eye to detect peel-and-stick over the real thing.
The benefits are not exclusively for renters — homeowners can also appreciate the no-strings-attached alternative to permanent cabinet options that peel-and-stick provides. This is ideal for those with an eclectic or unconventional sense of style who may have a hard time selling their property with unique or high-maintenance counters and cabinets. Once move-out day rolls around, all you have to do is peel off the wallpaper and hit the road.
2. Remove cabinet doors for open shelving
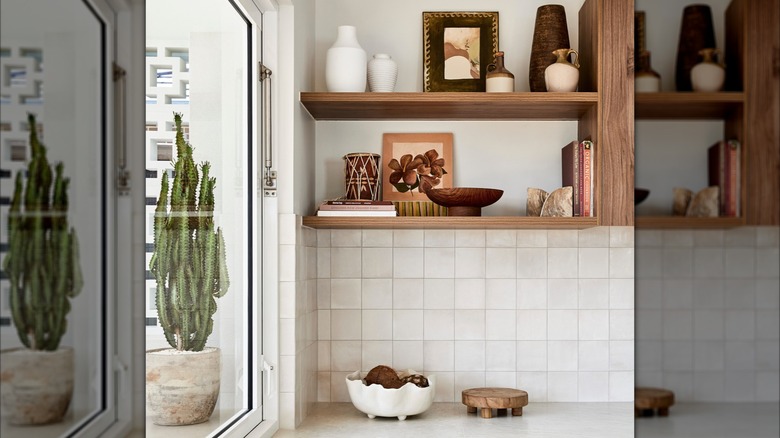
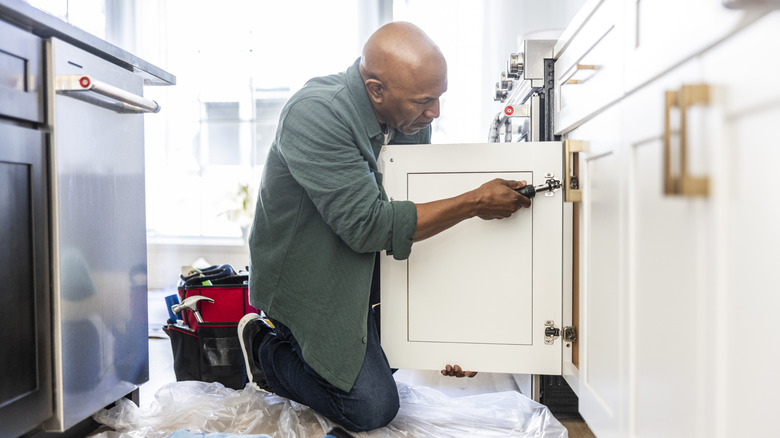
So open shelving was crossed off the cool list, but if you enjoy the look (or you can't stand looking at your current cabinets) then why not go for it? It's a quick fix that starts by removing the cabinet doors and hardware with a screwdriver. Some people opt to remove the middle stile for a more spacious look, but if you'll need to place the doors back before you move out, it's best to leave that part as-is.
And with that, you have open shelving! To fine-tune the details and elevate your result, consider going in with a wood finish to achieve a glossy modern effect or a natural matte look. While the project is easy to accomplish, the day-by-day upkeep is a different story, according to some renters who have already tried it out. Be ready to keep your dishes dusted and orderly at all times, because they'll be constantly on display.
3. Apply glass inserts
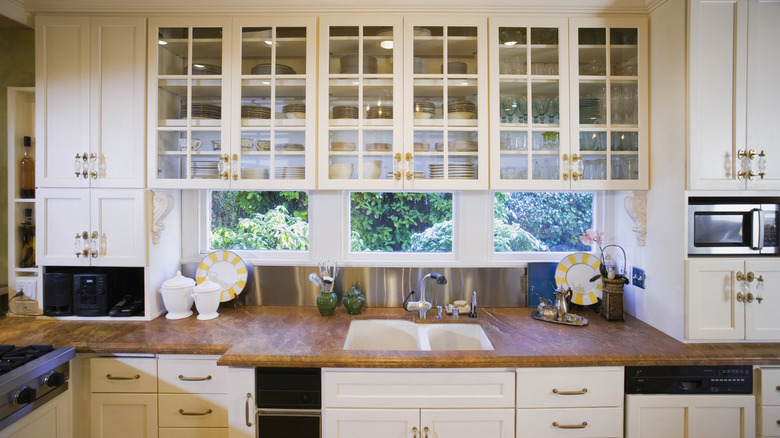
A more subdued albeit complex procedure to open shelving is to add glass inserts. You'll still get rid of your ugly cabinets while providing a look that's more conservative and requires significantly less dusting. The style complements traditional kitchens and modern designs alike, so you won't need to worry about your interior meshing well with the look. Just worry about getting the job done right!
To do so, remove the cabinet door completely so that it's easier to work with. Then, measure your outline, but note that if you have recessed cabinets you shouldn't mark past a ½ inch from the border. Using a circular saw, set it to a ½ or ¼ inch in depth and cut out the panel. Next, grab a wood chisel and slowly pop out the panel before replacing it with plexiglass of the same size and applying a silicone sealant to finish it off. If you can pull off the project yourself, all it will cost you is about $5 to $20 per glass sheet. Otherwise, expect to shell out hundreds per day for a contractor.
Once you've made your masterpiece, it's time to organize it with function and taste. Stock your items together according to color for a more cohesive appeal and incorporate seasonal decorative items for an added touch. Balancing large items on each side of the cabinet also offers eye-catching symmetry.
4. Reface your cabinet doors
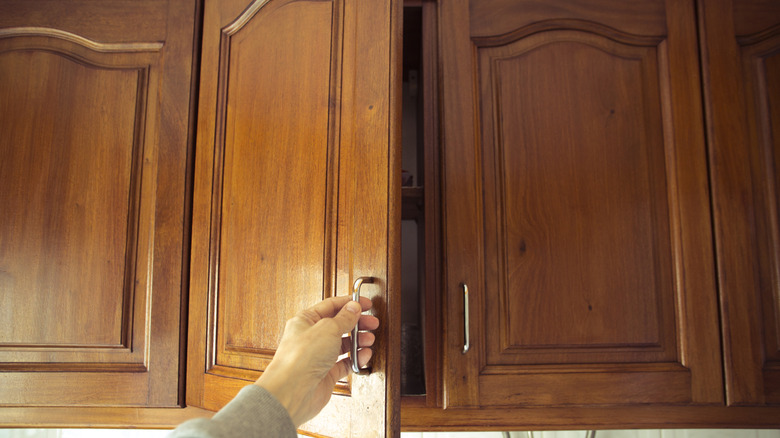
If you can't paint them, reface them. It's a fast hack to achieve a new look without the cost or effort of completely switching out your cabinets. With a cabinet reface, all you have to do is change the doors while leaving the box and frame as-is. If your primary issue is aesthetics and not a structural problem or water damage, refacing will work wonders for your interior within a budget-friendly limit.
You have three main materials to choose from when refacing cabinets. Opt for solid wood or wood veneers that exude a high-end feel, durable and scratch-proof laminate sheets, or thermofoil, a wood-grained pattern plastic coat that's highly resistant to moisture. All three of these come in a variety of styles to cater to your taste, but if you want to stay ahead of the trends, try a retro pop of color as vintage kitchen styles are on the rise. Light cabinet work will cost you anywhere from $1,000 to $5,000, but a bigger job will set you back around $7,000 to $15,000 depending on the scale and materials used. If you have funds to spare, consider replacing your cabinet hinges and hardware while you're at it for a near-complete makeover.
5. Swap the hardware

Cabinet handles and knobs, as well as doorknobs and sink spouts, all constitute kitchen hardware and influence your cabinet's style. Options like minimalist gold, rustic shapes, or elegant traditional hardware can all drastically switch up your look in an instant. Farmhouse and brass have both had their moment but are still lingering around, though overusing matte black fixtures is officially out.
If you're ready for a new hardware design, all you'll need to DIY is your hardware of choice and some wood putty, along with the tools to get the job done. That includes a drill, drill bits, screwdriver, tape measure, and mounting template. To start, remove your old handles or knobs and make sure your new ones align with the holes in your cabinets. If so, secure them into place with the screws provided in your new hardware set using a drill or screwdriver.
On the flip side, if the holes don't match, seal off the old ones with wood putty and measure where you'll need to drill the new ones into place. Pro tip — a cabinet hardware template will make the job 10 times as easy. After you've marked the holes, grab drill bits that fit the size of your screw holes. Once the hard part is done, you'll be ready to install your shiny new hardware.
6. Transform your space with lighting
A little mood lighting goes a long way. The feature is modern, can be controlled via motion or your smartphone, and influences the vibe of your space (i.e., warm whites promote relaxation while cool whites make it easier to focus on a task). Hard-wired lighting fixtures require professional installation, but if you have plug-ins or battery-operated lights, you can pocket the money and DIY. All you'll need are your lights and the willpower to get it done.
First, lay out the lights and make sure they can reach the outlet from their designated place by your cabinet. Remove the mounting cap and place it under the cabinet, making sure to mark where you want to make the holes with a pen. Then, drill them first alone and later aligned with the cap placed perfectly in the center. Proceed to secure it into place with a screw, repeating the procedure for each mount as well as the power box. Then, twist each light onto its designated mounting screw and hide the wires with cord clips for a seamless finish.
Trending tape lights are much easier, as all you need to do is stick them into place. Recessed lights, on the other hand, boast a sleeker look but require holes to be cut through the cabinetry. Rope lights fall somewhere in the middle of the spectrum, as they need to be attached into place with clips that you must screw into your cabinets.
7. Add crown molding
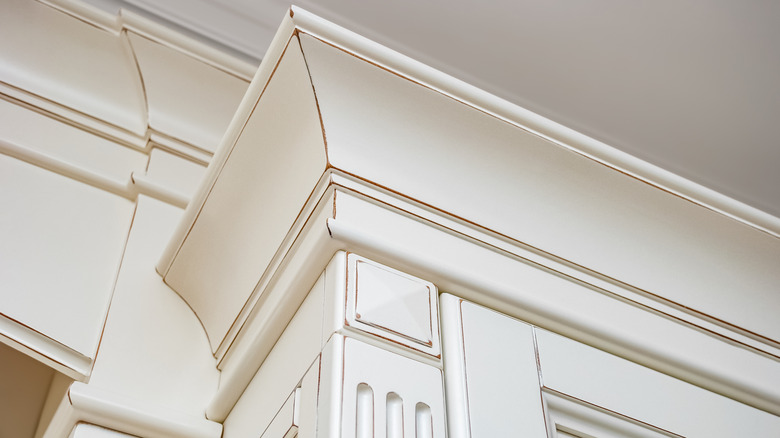
Crown molding is a prime example of how a small detail can make a big impact. The decorative trim offers a fast and easy way to elevate your cabinets from plain to posh. Whether you go for the traditional look, bottom molding, or a stacked or stepped choice that lengthens the appearance, you'll always end up with a sophisticated result that transforms your kitchen into its most elegant version.
Don't attempt the project if you don't have at least intermediate DIY skills. If you give yourself the green light, then you can start prepping the area by attaching ¾-inch wood strips along the wall as a nailing surface. Then, cut the rest of your crown molding to size with a miter saw (try 45-degree corner cuts and 90-degree cuts at the edges). After running a dry-fit test to make sure they're properly sized, glue the molding into place, always making sure no boards are crooked. You can find a full tutorial to follow online to ensure success.
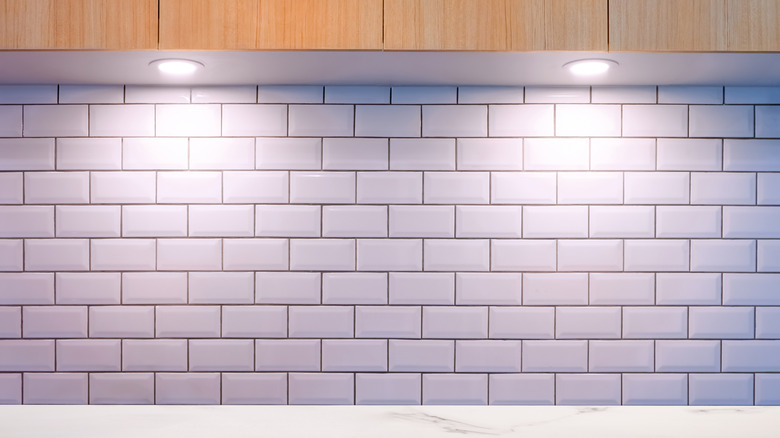
8. Elevate with a backsplash
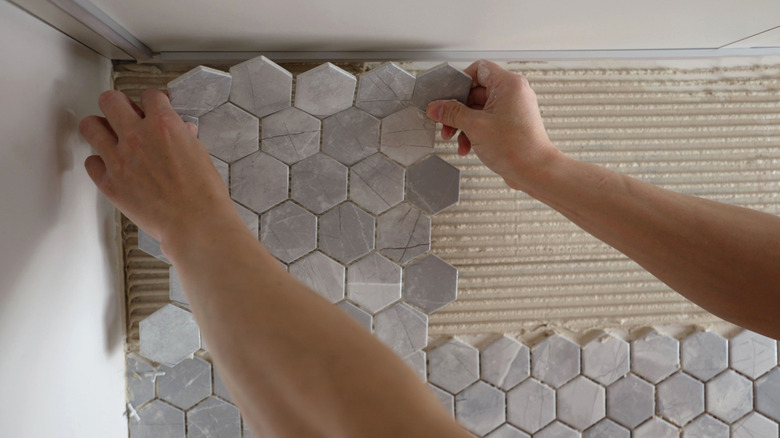
Sometimes you don't need to tamper with your cabinets at all to give them a facelift. For example, light backsplashes, marble, Moroccan, or glass tiles will brighten pale-hued cabinets, while metallic, textured stone, or warm-toned backsplashes complement deeper colors. Subway tiles suit both, but they've been around for a while and are starting to look dated.
If you want to stay on trend for 2025, consider backsplashes made of metal, organic tile, natural stone, tile murals, or colorful grout to infuse a contemporary vibe into your space. Some homeowners are also opting to reach their backsplashes to the ceiling or match them to their countertops as an innovative touch.
The best part of this kitchen remodel option is that it can be completed with renter-friendly peel-and-stick adhesive. It's relatively cheap and highly effective, lasting 10 or more years if applied right. As a pro tip, you should start from the corner and use a smoothing tool as you go. To remove, warm it up with a blow dryer for about 10 minutes before slowly prying it off with a putty knife. Peel-and-stick backsplashes are easy, fun, versatile, and non-permanent, but best of all they'll remove the stress when oil splatters as you add food to a pan.
9. Line your cabinet interior
Your kitchen cabinets are more than their exterior. The inside is where all your stuff goes, so it's just as — if not more — important to keep it clean and fresh. You can show your inner cabinet some love by lining the interior with (you might have guessed it) peel-and-stick vinyl. While paper works fine for other cabinets in the home, the kitchen requires more durable and preferably waterproof alternatives. Plus, the lining won't move around when you're shuffling heavy plates and glassware into place.
Before diving in, be sure to deep clean the cabinet safely and properly. The rest is intuitive. Simply measure, cut, and stick your pattern of choice onto the bottom of your cabinet. While scissors work, an X-acto knife makes the job easier while providing better precision. The result? A clean place to stock your kitchen tools and dishware that will spark joy each time you open the cabinet door.
10. Install new hinges
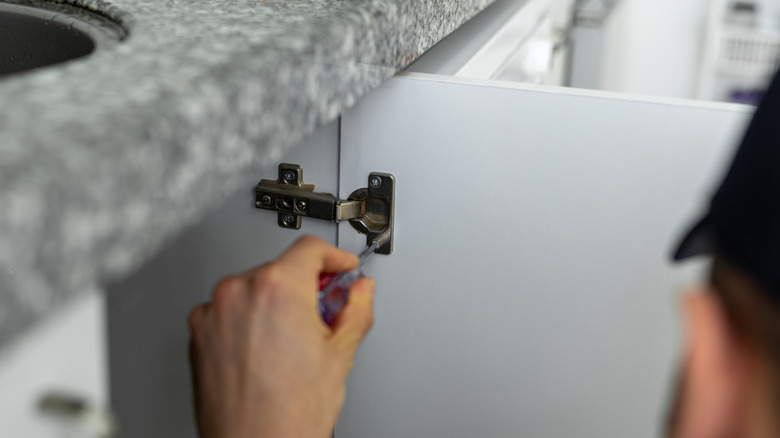
Hinges aren't the most exciting part of a cabinet. But if you need to refurbish rusty cabinets on a tight budget, it's wise to prioritize the parts that affect performance rather than focus on appearances alone. Plus, a fresh set of hinges will ensure that your cabinets hang straight and close fully, which is always a good look. Before diving in, do the necessary prep work. Are your cabinets framed, frameless, or European? Do you prefer concealed or exterior surface-mounted, and is your cabinet inset or overlay?
The installation process will be a bit easier if you're replacing hinges on an old door rather than inserting them onto a new one, because half the work will have been done for you. Either way, you'll need a screwdriver, a friend to hold the doors as you apply them, and some beers to offer said friend once the job is done. The process itself is simple — all you need to do is mark the screw holes on the door, attach the hinges, and repeat the process on your cabinet wall. It's good practice to clean your doors before starting (but be sure not to use baking soda and vinegar).
11. Use wood stain or restorers
If your issue isn't the essence of your cabinets but rather their condition, you can try using a wood stain or restorer as opposed to painting them. Staining will get you the shade you desire; however, it's an invasive procedure that uses a solvent to change the pigment. It's popular among renters and homeowners with unsightly honey oak cabinets who crave a darker, more stately look. It's also an excellent way to elevate unfinished wood.
Restorers, on the other hand, offer your cabinets a light makeover without any major changes to their appearance. By gently brushing the restorer onto the wood, removing the excess, and applying a protective product about half an hour later, you'll get good-as-new cabinets. If you're looking to preserve the originality of your wood but detest its wear and tear, restorers are your go-to option.
12. Insert sliding doors

Give your kitchen a creative twist with sliding doors that are both fun and functional. These are an exceptionally useful tool for tight spaces that make it hard to fully open your cabinet doors. Instead of blocking the way and extending your arms in awkward directions to swing cabinets open, sliding doors will allow you to save space while enhancing visibility.
When done right, sliding panels offer satisfaction as they glide effortlessly along the track. Your track will make or break the project, so it's essential that you get that part right. Feel free to DIY if you're up for the challenge. Otherwise, purchase a kit on Amazon, making sure to saw off any extra length so it can fit the dimensions of your cabinets. After cutting your panels of choice to size, sanding the edges for a flawless finish, and adding handles or finger holes, you'll be ready to pop them in. There are plenty of YouTube tutorials to check out for an in-depth guide that walks you step by step through the process.
13. Cover your cabinets with chalkboard
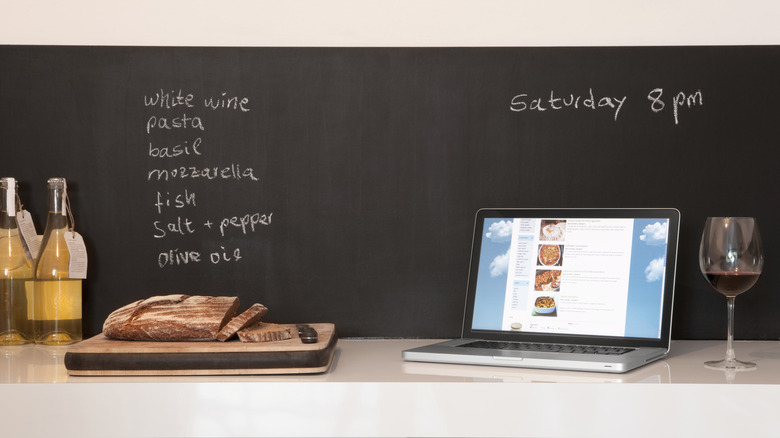
Once reserved for classrooms, chalkboards have been taking over walls and cabinets in restaurants and kitchens. The trend offers a fun and fresh spin on interior design, where you can track your grocery list and design artwork in the same convenient place. When your kitchen is an eyesore, it also works as an excellent mask to cover it up.
Before you get started, it's essential to know your options. A quick Google search will lead you to believe you need paint to attach the board to the cabinet, but peel-and-stick alternatives work just as well. As long as your surface is smooth and flat, all that's required on your end is cutting it to size and sticking it on. Look for versions valued for their quality and simple application and removal.
An alternative to the peel-and-stick is the magnetic chalkboard. It also needs a flat and texture-free surface to work, but it substitutes the contact paper of the peel-and-stick with a magnetic sheet applied via adhesive strips. Naturally, its magnetic substance means you can stick magnets on it, too.